University of Technology Sydney
    Generic filters
    Exact matches only
  • Home
  • Information for all users
    • Information for all users
    • Applications file retentions and account data
    • Approval process FA & GFA Canvas Roles
    • Approval process for elevated roles
    • Authorised faculty contacts
    • Key session dates in Student Canvas
    • LATS Technical Support
    • SPARKPlus User Guide
    • SPARKPlus: moderating group work assessment
    • Technical integration request
  • Information for Students
    • Information for Students
    • Kaltura captions and where to find them
    • Kaltura Channels for student collaboration
  • Kaltura
    • Kaltura
    • Canvas Media Analytics
    • Channels to Group & Control Access to Your Media
    • Download Webcam recording
    • Download your media from Kaltura
    • How to share a Playlist
    • Introduction to Kaltura Lecture Capture
    • Kaltura admin dashboard
    • Kaltura Closed Caption
    • Kaltura Go Mobile App
    • Kaltura Interactive Path
    • Kaltura Menu or Channels
    • Restrict access to your media with Scheduling
    • Supervisors Access to MyMedia of Kaltura
    • Why Publishing Medias?
  • Known Issues
  • Systems' Status
    • Systems' Status
    • Atomic Jolt Discussions
    • Atomic Jolt Poll
    • Atomic Jolt Search
    • GradesPlus
    • Kaltura status
    • Turnitin status
    • Zoom Status

Home » Voice Narrated PowerPoint using Office 365 for PC

Posted on July 31, 2015 by Shirin Bayat

Voice Narrated PowerPoint using Office 365 for PC

Every student and Teacher has access to Microsoft Office 365 here:- Office365

These instructions are for Office 365 PowerPoint for PC. (However all versions of PowerPoint for PC are similar). Instructions for and issues with doing this on the Apple version of Powerpoint and are here.

Voice Narrated PowerPoint can be used for the following:-

  • Flipped Learning – threshold concepts, mini lectures
  • Introduction to Subject
  • Instructions for students for an assignment – the possibilities are endless!

TIP With Voice Narrated PowerPoint for PC, when you record a narration, you run through the presentation and record on each slide. You can pause and resume recording.

Lets Get Started

Have your powerpoint ready to go – have some dot points to help you remember what you are going to say – and the great thing about PowerPoint is you can practice as many times as you like!

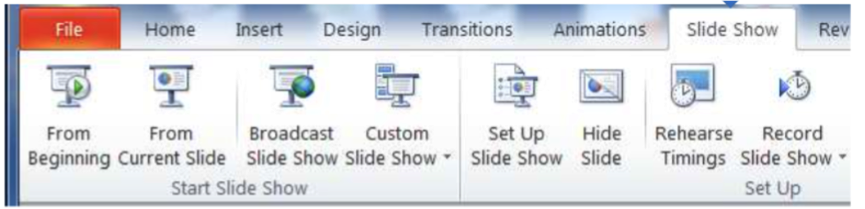
1.  Select the slide that you want to start your recording on.

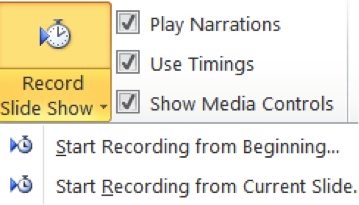
2.  On the Slide Show Tab Click Record Slide Show       powerpoint2

powerpointpic1

3.  When you click Record Slide Show the following will appear:-

TIP – If you selected a different slide to begin the recording on, the Record Narration dialog box

appears.

Do one of the following:-

To start the narration on the first slide in the presentation, click First Slide.

To start the narration on the currently selected slide, click Current Slide.

startrecording

4.  Once you have chosen the where you are going to start your recording the following will appear

record slide show

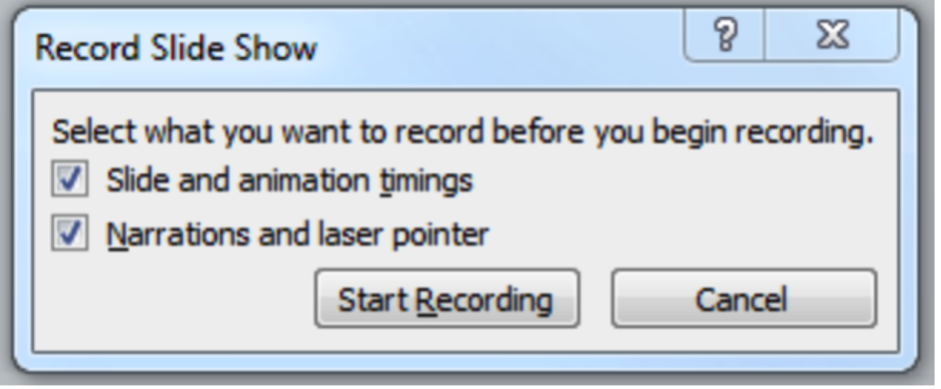
5. Press Start Recording

6.  In Slide Show view,speak the narrative text into the microphone and then click the slide to advance to the next slide. Follow this process for each slide that you want to add narration to

TIP – You can make changes to the slide content but not the recording.

7.  You can Pause recording at anytime

pauserecording

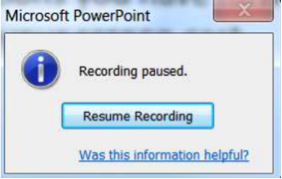
Tip You can also pause or resume the narration, right-click the slide, and then on the shortcut menu, click either Pause Narration or Resume Narration.

8.  When you have finished recording click the exit X and it will ask you the following:-

after you finish recording

Click yes if you are happy.

Now to Save as a Movie

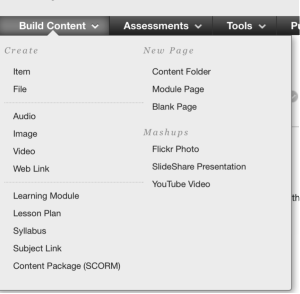
9. Go to File – Save and Send – create Video

createvideo

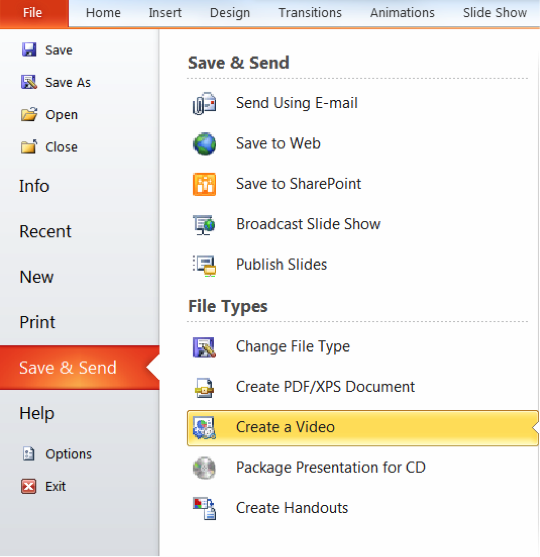
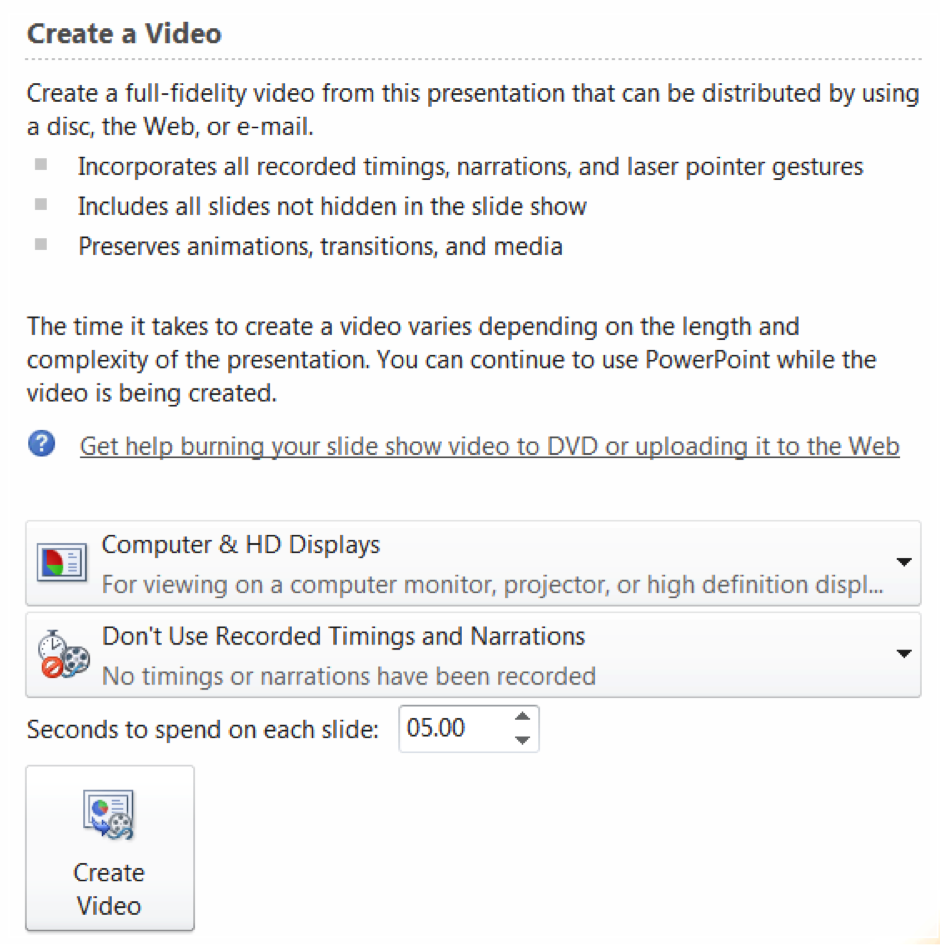
10.  You can now choose how you are going to save your presentation movie

TIP – click Computer & HD displays

Click Drop down arrow next to Don’t Use Recorded Timings and Narrations and click on 

Use Recorded Timings and Narrations 

final step to create a moviepp

TIP – when you save your video – remember to give a name that makes sense to you and save it onto you computer or flash drive.

When you upload it on to UTSOnline you can use the insert video link

insertvideo


Posted in Creating video, How-to videos, Learning.futures | Tags: powerpoint, PPT, slideshow, video, windows |

Pages

  • Information for Students
    • Kaltura Channels for student collaboration
    • Kaltura captions and where to find them
  • _include_enrolment_form_2
  • _include_IT_Support_Centre
  • _include_lats_team
  • Access Zoom recordings of a Canvas course
  • Administration Authorisation 2025
  • Details of the Zoom course meetings in Canvas
  • Join a Zoom course meeting through Canvas
  • Kaltura
    • Kaltura Go Mobile App
    • Why Publishing Medias?
    • Supervisors Access to MyMedia of Kaltura
    • Restrict access to your media with Scheduling
    • Canvas Media Analytics
    • Channels to Group & Control Access to Your Media
    • Download Webcam recording
    • Download your media from Kaltura
    • How to share a Playlist
    • Introduction to Kaltura Lecture Capture
    • Kaltura admin dashboard
    • Kaltura Closed Caption
    • Kaltura Interactive Path
    • Kaltura Menu or Channels
  • Kaltura assignments
  • Kaltura My Media – New placement
  • Known Issues
    • How to remove Mentimeter cookies
    • Chief Instructors in SPARK cannot select the correct UTSOnline subject as an enrolment source
    • Incorrect Rubric display in graded Portfolio Artefacts
    • Statistics Reporting for a content item contains incorrect data
    • Turnitin submission error – An unusual number of excessively long or short words
    • Zoom cloud recordings are not showing in ‘Gallery View’
    • Microsoft Office issue with Shared Portfolios
    • Turnitin bulk download issue
  • List of Schools
  • Search Results
  • Similarity Scores not updated after Assignment Due Date
  • SPARKplus upgrade from v3.05 to v3.12
  • Student guide Learning and Teaching applications
  • Systems’ Status
    • Atomic Jolt Discussions
    • Atomic Jolt Poll
    • Atomic Jolt Search
    • GradesPlus
    • Kaltura status
    • Turnitin status
    • Zoom Status
  • Zoom Meeting Guide
  • Information for all users
    • LATS Technical Support
    • Approval process FA & GFA Canvas Roles
    • Approval process for elevated roles
    • Authorised faculty contacts
    • Key session dates in Student Canvas
    • SPARKPlus User Guide
    • SPARKPlus: moderating group work assessment
    • Technical integration request
    • Applications file retentions and account data
  • Learning and Teaching Systems ITU
  • Detecting similarity matches for consecutive student submissions in the same subject
  • Detecting similarity matches to earlier submissions
  • IML Sound Booth
  • SparkPlus for students
  • Turnitin for students
  • SPARKPlus is temporarily unavailable
  • IML Learning Technologists
  • Turnitin and Feedback Studio

Archives

  • June 2022
  • March 2016
  • October 2015
  • September 2015
  • August 2015
  • July 2015
  • April 2015
  • February 2015
  • November 2014

Categories

  • Creating video (3)
  • For Students (1)
  • How-to videos (4)
  • Learning design (2)
  • Learning.futures (6)
  • Practical examples (5)
  • Tools (6)
  • Uncategorized (1)

WordPress

  • Log in
  • WordPress

Subscribe

  • Entries (RSS)
  • Comments (RSS)

Links

  • UTS homepage
  • UTS library
  • Current students
  • Staff Connect

© Copyright UTS - CRICOS Provider No: 00099F - 2 March 2017 9:32am. This page is authorised by the Manager, Learning and Teaching Systems, ITU.